Wednesday, May 20, 2015

Glossy Skin - My top 5 favorite highlight/illuminating products!


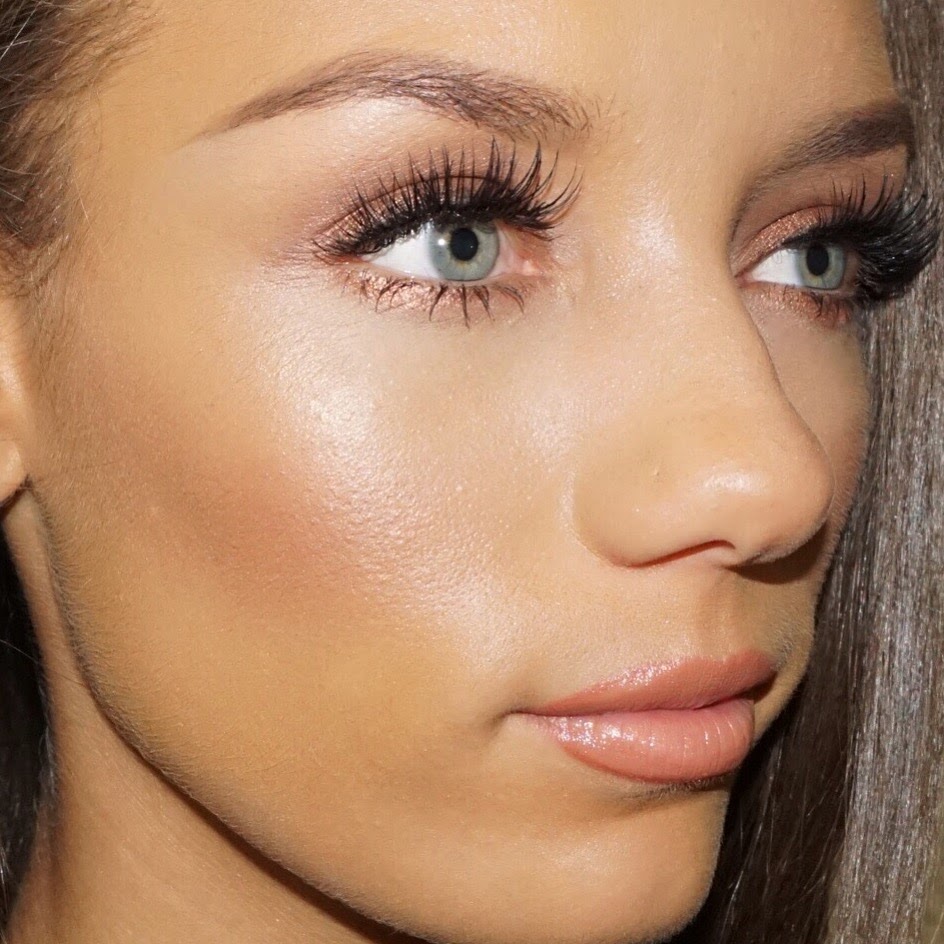
       My favorite highlighters are not based on the color so much as the consistency.  I like my highlight/illuminating products finely milled and almost creamy. I stay away from those with chunks of glitter. Most of these i apply with my finger or a Glamour Sponge.
                                                1. First on my list is Jouer Cosmetics cream highlighter in Champagne
Champagne

This is a beautiful finely milled cream rose gold color that goes on like a dream. The creaminess of this product is insane. Before lightly powdering the face I dab some with my finger tip on the high points of the face. Cheekbones, bridge of nose, cupids bow, chin and sometimes even forehead depending on the look. I've used this as a shadow too.  Aside from Champagne, Jouer cream highlight comes in Camellia (white pearl) and (gold). This comes in a small square compact that can connect with other Jouer products. Price is $22 with 2g of product. Well worth it too


RBR Sea of Sowers
2. My second favorite is not a cream or powder, but a liquid. Rouge Bunny Rouge Sea of Showers. It's a super silky also finely milled rose gold with a dash of pearl liquid. I like using this one mixed with a highlighting pen or as a primer on the high points of the face. It dries fast and won't move so you have to work fast with it. Its highly pigmented and a little goes a long way. This is a UK brand and cannot be found in store. You can order it online and if you're lucky enough to find it on the uk, you must try the other 3 colors too. Only downfall is the amount that dispenses when you pump it. Because a little goes a long way, it can be wasteful to over pump. Comes in a   glass frosty bottle with a pump. The price is $50 for 1.01oz.


Soleil Tan De Chanel


3. Next on my list is Soleil tan de Chanel Sheer illuminating fluid. It's a liquid as well. Although it's not as pigmented as the RBR I mentioned above. It comes in one color. I love this for a subtle glow. Mixed with foundation or even on top. It has a rosy champagne gold to it and the consistency is a bit runny. For the price I do think it's something everyone needs in their kit. Especially for a subtle dewy look.  Comes in a glass bottle. Price is $48 for 1oz


BECCA Opal
 4. Now to a powder. I'm sure this one is a favorite amongst many makeup artist or even woman who love a glow alone. Becca cosmetics luminous compact in Opal. This beautiful rose gold color has very finely milled pearl shimmer that makes the light reflect ridiculously pretty.  Dusted on the cheek bone with a fan brush the bridge of the nose Cupid's bow. Or you can apply it with your fingers. The consistency makes it easy to blend as though it were a cream. This is by far my favorite formula in a powder form. Price $38. .28 oz


5. Another powder highlight i like is from NARS. Its the Dual Intensity blush duo in Frenzy. The highlight side on the left is a very pretty champagne tone. It also has a creamy feel to it which allows it to go on smoothly. It can also be used wet for a more intense application. I use it with a synthetic brush either alone or as a topper over the cream highlight. The price is a bit high for .21oz of product, but i have yet to find something that's comparable. I am hoping NARS comes out with single dual intensity highlighters. Price is $45 for .21oz.


I can sit here an name so many more highlighters since my collection has a vast variety of them. These are my top 5 that i use more often. They are all very versatile and can be used in numerous ways. I would say that for the most part all of them are good on all skin tones if used correctly. Jouer has the light pearl cream that's perfect for light/pale skin complexions. They also have a gold tone that's great on darker skin. RBR and Chanel can definitely be used on all skin tones under or mixed with foundation. Becca pearl and Nars Frenzy i would use for medium to dark.

Saturday, June 23, 2012

Orange you glad it's not Red!?!

           For many years red lipstick has been a staple in every woman's makeup bag. Although, i love me a good red lip, this summer i have came across a more appealing color. I have not only used this color alone, but i mix it with red to create the perfect red/orange hue. I've used it on many of my clients and this is one of my favorite looks.


Remember that sometimes Less is More. 

Base: I used Nars Sheer Glow foundation in Stromboli..

Eyes: I started with bronzed color and applied it all over her lid. I then used a champagne shimmer highlight for the brow bone and inner corner. I used the same bronze color to define the lower lash line and smoke it out. For the water line i used a brown pencil, added some natural lashes and added lots of mascara.

Cheeks:  For her cheeks i used a peach tone blush to keep it natural. My favorite right now is Edward Bess Monte Carlo quad

Lips: Last but not least i used an orange lipstick to complete this look. My favorite orange is 


Hope you enjoy the color as much as i do. For bookings email makeupartisgaby@gmail.com  


Monday, June 4, 2012

Bronzer and Blush in 3 Steps!!


Bronzer can be very tricky, but with the right technique you will have it down in no time! Remember that just like everything that we learn in life, Practice Makes Perfect!! 
What you will need: 

*Matte Bronzer in 2 shade darker than your skin tone. (preferably with a orange or yellow undertone)

Perfect colors:

MAC Bronzing Powder-Bare shouldered bronze


or


*Blush in a light pink or coral color. 
Perfect colors:

NARS-Orgasm (for a slight shimmer effect)

or

NYX Peach (matte)

Step One: Find your cheekbone. There is a trick to this and it is very simple. Grab your blush brush against your face starting at the center of the ear and placing the brush diagonal towards the corner of the lip.
Step Two: Grab a brush that has a slant to it.  This will make it easier to apply. Once you have your brush dab it into the bronzer. (Don’t be afraid of getting too much on the brush). Swipe the brush down your cheekbone ending before the apple of your cheek. 
Step Three: Using another blush brush or clean the one you just used, dab it into the blush. Place the brush right on the apples of the cheek. (Smile to see where to find your apples). In a circular motion blend the blush on the cheek until you see the color and then blend towards the bronzer. 


Kendall and Kylie Jenner in the desert!!

It's always a great shoot when working along side these two. They are not only easy to work with but are fun as well. Here are some shots of a desert shoot we did. 

And of course MAKEUP BY: ME (Gaby Ramos Torell) 


Monday, November 29, 2010

Kylie Jenner Photoshoot!

I had the opportunity to work with Kylie Jenner recently. It was a pleasure to work with her and alot of fun. Since she is 13, i had to keep the make up to a minimum but she still looked fabulous. The wonderful and talented Monica Rose was styling and hairstylist Alon Shalom. Here are just a few BTS and images of the shoot.


Mascara!


Say No to Tarantula eyes!!!!! lol... remember that commercial?! ;) Lashes are a big deal when it comes to makeup.. you have to make sure the lashes are on point so your eyes stand out even more after the eyeshadow, the liner and all that eye makeup.. the main thing to focus on is length and volume. To achieve this you must make sure your eyelashes are properly curled, and the mascara is the right one for you.


Eyelash curler: A spoon (yes, you can curl your lashes with a spoon but that's a whole different post.. lol ) , Shiseido or Shu Eumura are the best.. not only do they wrap around perfectly on the eyelid, they also have a strong grip to get the perfect curl on the eyelashes. When you curl you place the eyelash curler right on the rim of the lash line.. give it one strong squeeze and slowly while squeezing on and off with the curler pull outwards towards the sky... ;)

Mascara: There are two that i truly LOVE!! Bad Gal Lash by Benefit and Lash Injection by Too Faced.. Both have the big brush that will help with volume.. although the consistency of both are very similar, Lash Injection is waterproof. When applying mascara.. remember to coat every lash.. trust me.. it makes a difference. Start at the lash line from under the lashes by wiggling the brush side to side to separate the lashes. Once you have mascara on the lashes along the lash line, you can pull out with the brush all the way to the end of the lash. **you can put on as many coats as desired .. i prefer a few for a fuller look** let the first coat dry before applying more. Put less mascara on the bottom lashes to open up the eyes even more.

If necessary use a lash comb to remove any clumps of mascara.

Lashes make a HUGE difference on the eye.. it not only makes your eye makeup stand out more but it also opens the eyes up!! soooo Lash Out!! ;)

Wednesday, October 6, 2010

Randomness Makeup Tips...

Helllo Makeup Lovers... so i figured i would do this post kinda different.. i asked for topics and i got them alright... lol.. so lets start with:


Brushes: When puchasing brushes the first thing you want to look at are the bristles. Depending what you are using them for, brushes should range from soft to a little stiff.

Don't break your head trying to figure out what brush is perfect for what.. most of the time they are labeled.. Brushes are an investment.. when taken care of properly they will last for many years.. the good ones will not lose bristles on the face or when you clean them with brush cleaner.. sooooo don't be too cheap... its probably the most you will spend when it comes to makeup. http://www.mudshop.com/ has excellent brushes and for more cost affordable ones http://www.mondastudio.com/ Not as good but will work.

Foundation: During the Fall and Winter season we all tend to lose color... unless you like to do the tanning bed thing.. but now a days its just a little too expensive for all that... Foundation can be a little hard to pick out depending on the undertone of your face. Most of us have a yellow undertone. Meaning that your foundation should have yellow tone to it in order to match your face. For darker skin tones undertones may vary from orange to red. Match the color to your neck.. never your hand or cheek.. you want an even face not a two tone one! ;/


Foundation should be 1/2 a shade darker than your natural skin tone. This is because our faces are in most cases a little lighter than our bodies. You should always have two different color foundations. One for the Spring/Summer (when the sun is out more) and one for the Fall/Winter (when the sun is out less).

*A powder to set the make up can also change the color of the foundation.

It should be of the same brand. This will allow you to mix the two when needed. I use MUD cream foundations which are easy to blend and mix together. A little goes LOOONG way... I also recommend Make Up Forever HD foundation for everyday use. Its light and its liquid.

If you need color matching email me: makeupartistgaby@gmail.com i can color match you and shop with you so you know that you are choosing the perfect tone for you! (rates vary) but are affordable ;)